
Best Ever Dharwad Peda Recipe (2023)
This post comes straight from the heart of foodies everywhere! Making homemade Dharwad Peda has long been the dream of those who have experienced its incredible sweetness first-hand.
Dharwad Peda is a legendary, milk-based, sugar-coated dessert from Dharwad in North Karnataka with over 175 years of history and an intriguing backstory surrounding its creation. Shri Ram Ratan Singh Thakur’s recipe first made history after migrating from Uttar Pradesh due to a plague outbreak; after that, it spread widely thanks to Shri Babu Singh Thakur (his grandson). This legendary recipe lives on today thanks to their efforts.
Line Bazaar Peda is an exclusive family recipe known by its street address, where its original shop was located.
Original pedas were uneven in shape, and when made by their creators, they are said to be hurled onto sugar bowls, where they land and become coated!
Since forever, this fantastic, crumbly-textured, and mildly sweet treat has been on my ‘don’t attempt to recreate’ list! My reasoning was simply because it seemed impossible – starting from milk but ending up with such a fantastic treat?!… was what my wayward thoughts went astray…
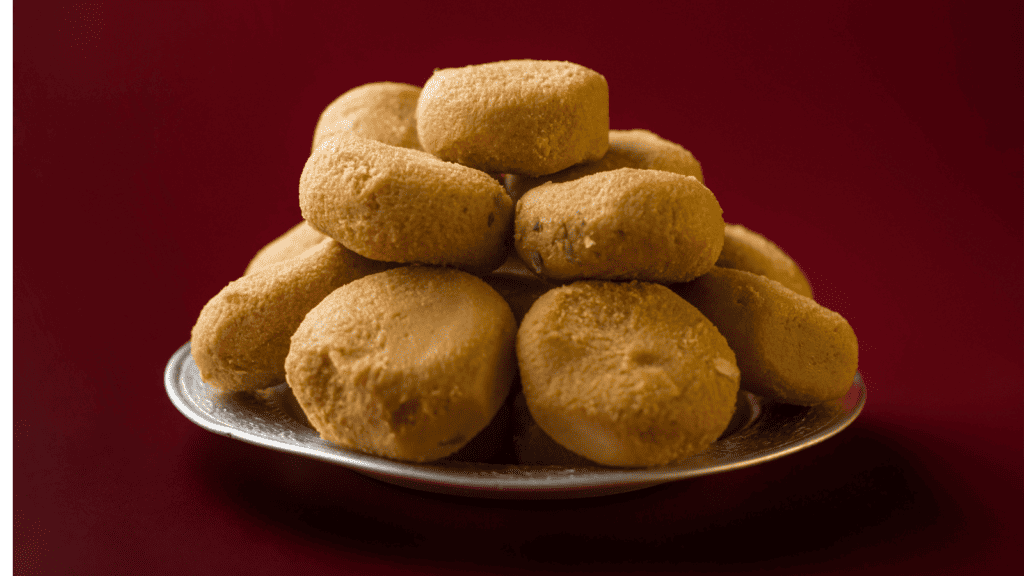
Dharwad Peda Recipe But everything changed as we celebrated our inaugural hop-versary! A year ago, we began participating in blog hops as a team – what better reason than to celebrate with a delicious southern Indian-themed feast? This post features Dharwad Peda Recipe as one option for this epic celebration!
At last, I found recipes and inspiration in videos, Smt Radha Natarajan’s space, and Kannada cuisine. With considerable trepidation yet great eagerness, I started cooking; ultimately, my creation was below.
Making cheese requires time, patience, and skill. Starting from scratch means making ricotta cheese from the milk and then browning up milk solids until reaching the desired peda appearance and texture can take some time if starting from scratch is expected.
I simplified things by purchasing pre-made khoya/mawa (milk solids). If you would instead cook from scratch, then feel free to do so – unfortunately, I was limited on both time and ingredients at that time; using buffalo milk mawa would suffice since cow’s milk may require additional ghee/milk to complete its creation, while using buffalo milk khoya needed less of both things during its creation!
That can also be done if you prefer using cow’s milk instead of buffalo milk khoya. Additional ghee and milk may need to be used during the cooking process as more milk solids tend to evaporate as you stir the mixture while cooking it, while buffalo milk requires significantly less.
Finding khoya/mawa in the UK had long been out of my reach until very recently. To my delight, it was waiting patiently in an Indian grocery store on one of my visits recently – finally available for me!
Remember, cow’s milk khoya or ricotta cheese must become brown as its liquid evaporates, yet still retain a soft grainy texture with added ghee or milk enrichments.
Trial-and-error will help make things clearer – otherwise, as it browns, it will become too powdery and won’t come together into a cohesive peda peda peda shape peda shape; so keep adding both ghee and milk gradually as it cooks and browns to achieve optimal results peda peda cheese making technique!
Buffalo milk khoya yields a richer color without needing any additional ghee. Instead, milk may be necessary as it cooks to ensure soft grains.
Be mindful of adding sufficient sugar. Cutting back too drastically could compromise its taste!
I don’t suggest that you indulge in these rich pedas on an ongoing basis; occasional treats should undoubtedly be allowed; just please be mindful of how much of these indulgences you consume!
Assemble all ingredients. Use castor sugar to sprinkle or rollover, using either cow’s milk khoya (it tends to become dry when cooking) or regular milk (more may be required), plus an optional sprinkle or roll with 2 to 3 tablespoons of ghee for coating and smoothing purposes if using cow’s milk mawa/khoya).
Next, grate or crumble it up so it fits onto a tray. METHOD For best results, use grated or crumbled khoya/mawa.
Heat a thick-bottomed pan over low heat and add grated khoya/mawa to it, stirring continuously over a low temperature until the ghee separates out, continuing to cook while stirring. You will soon observe this and should continue going on a low setting to achieve perfect results.
As the khoya cooks, its color changes gradually from light brown to darker. At 5 minutes of cooking time, golden brown should become visible; 10 minutes later more, darker. Although I used low heat for this batch of khoya, even as soon as I let go of my ladle for photos to take, its base started catching. So beware and stir constantly for optimal results!
At any point in time, if the mixture begins to look dry, add a small amount of milk and continue cooking. After 20 minutes, it should become much darker, as shown in the pictures, and can be spread out using a spoon to reveal a crumbly texture – mix this in before adding 4-8 tablespoons of sugar. Continue until finished.
At this point, turn off the heat and allow the khoya to gradually cool before continuing your work. Our work is still far from done!
Transfer the khoya to a mixer/grinder/food processor, and powder it. Aim for an even mix. Some moisture may remain present; that is fine too – ensure it forms an even, smooth paste before continuing your cooking journey until its color deepens further and it comes together for use as peda filling material.
Transfer the powdered khoya back to the pan and stir continuously with some milk until its color deepens, for about one to three minutes before taking it off the heat and allowing it to cool slightly before tasting for sweetness if needed and adding sugar if necessary.
Prepare a small bowl filled with castor sugar. Pinch off small portions of cooked khoya and form cylindrical shapes while it is still warm; otherwise, you won’t be able to form nuggets. Roll each pedas in castor sugar before placing it on the plate.
Once chilled, store in airtight containers in the fridge and enjoy over time (if it lasts that long!).
NOTES
Always cook at low heat to prevent your peda from burning. To create homemade pedas from scratch, paneer must first be made; boil 2 liters of milk while gradually adding 1 to 2 tablespoons of lemon juice or curd or vinegar to curdle the milk as soon as it boils.
Once the milk has separated fully, strain through a cheesecloth or muslin towel/cloth before wringing its neck to extract any extra liquid and placing a heavy weight over this covered curdled milk bulk. Within hours you should have a soft and crumbly enough paneer for making pedas.
Transfer this paneer to a pan, add necessary ghee and milk until dark in color (if needed), then mix sugar before cooling and powdering in the food processor before repeating this process when cooking and pedas making.
If using cow’s milk khoya, it tends to dry out while being prepared. To remedy this, add 2-3 tablespoons of ghee, several spoons at a time as necessary, stirring and cooking continuously until done. If the mixture continues to dry as you, add more ghee or milk as needed until desired thickness has been reached.

Born and raised in a family of foodies, Georgia’s passion for cuisine was nurtured from a young age as she learned the intricacies of flavor and texture from her grandmother’s kitchen. As an adult, this early fascination blossomed into a full-fledged love affair with the culinary world.