
How to Apply Edible Image to Cake Guide Using Inks
In the world of cake decorating, edible images have revolutionized how we express creativity and personalize our desserts. These images, often printed with high-resolution edible printer systems, employ edible inks on thin flat sheets like edible icing sheets or wafer paper to produce stunning visuals.
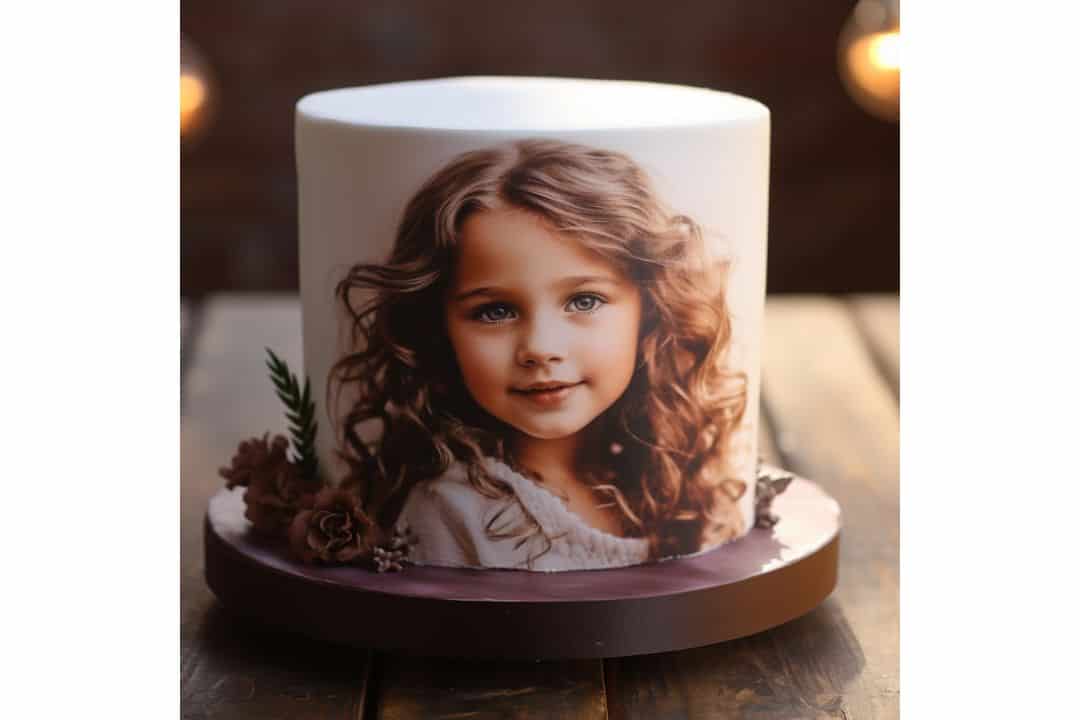
The resulting edible photo can transform an ordinary birthday cake into a memorable masterpiece. You may ask how to apply the edible image to a cake.
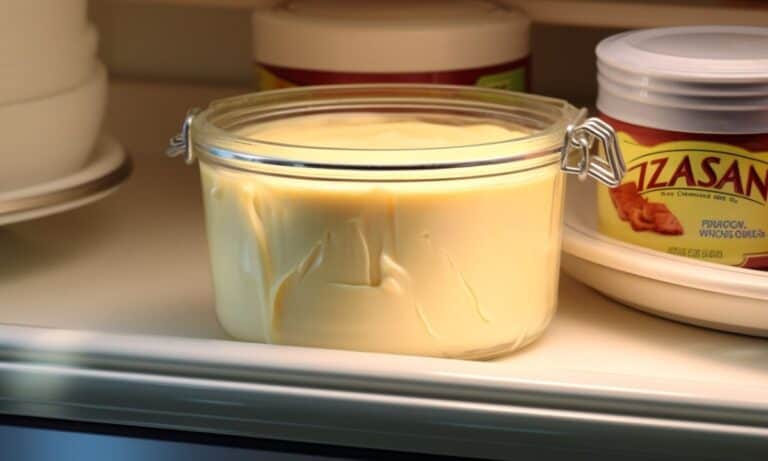
The heart of this process lies in the edible inks and edible icing sheets. These inks, infused with food coloring agents like FD&C yellow, soy lecithin, propylene glycol, and citric acid, ensure the printed edible image looks vibrant and is safe for consumption.
The quality of the print is often of high resolution, ensuring that every detail, down to the most intricate patterns and visible fingerprints, is captured.
Edible icing sheets are preferred by many for their ability to merge seamlessly with various frostings, from royal icing to cream cheese, buttercream, and non-dairy toppings.
When applied to the top of your cake, these sheets can mimic the texture of the cake’s icing, making the edible cake image appear as if it’s painted on.
For those who want a more textured look, rice paper or wafer paper is an alternative to the smoother edible icing sheets. These are often used for edible cake toppers with more volume and depth.
Humid conditions can be a challenge when working with edible images. During the summer months, it’s vital to avoid high humidity and excessive heat, which can cause the edible image to crease or affect the shelf life of the prints. Handling them with dry hands is also essential to prevent smudging or tearing.
While the printed topper is the highlight, the base cake can be adorned with edible decorations, sugar paste, and even edible stickers for added flair. And if one wants to store their printed sheet for later, a sealed bag offers protection against external factors.
In today’s age, where customization is critical, the rise of edible images allows for unparalleled creativity. Whether you’re commemorating an event with a custom edible image or adding edible icing prints to enhance your dessert’s aesthetic, the important thing is that these edible wonders provide a unique touch to any cake, making every celebration extra special.
Step-by-step Guide on Applying Edible Images to Cakes

Follow our simple instructions for a flawless sheet application every time.
- Prepare your cake: Start by ensuring that your cake is clean and free from crumbs or icing debris. This will help the edible image adhere smoothly to the surface.
- Cut and trim the edible image: Carefully cut out the desired shape or design from the edible image sheet using clean, sharp scissors. Take your time to be precise, as this will affect how well it fits on the cake.
- Positioning the image: Gently place the cut-out edible image onto the cake’s surface, ensuring it is centered and aligned correctly. You can use toothpicks to hold it in place temporarily if needed.
- Smoothing out air bubbles: Starting from the center of the image, use a flat spatula or your fingertips to gently press down and smooth out any air bubbles or wrinkles towards the edges. Be careful not to tear or damage the edible image while doing this.
- Finishing touches: Once you have smoothed out all air bubbles, step back and check if everything looks perfect. Make any necessary adjustments before proceeding further.
- Finalizing with a sealant (optional): To ensure longevity and protect against moisture, consider applying a thin layer of clear piping gel or food-safe glaze over the entire edible image using a pastry brush.
Following these essential steps, you can confidently apply an edible image to your cake like a pro! Remember to carefully handle the delicate images throughout the process for the best results.
Get ready to impress everyone with your beautifully decorated cakes using this handy guide!
Tips and Tricks for Using Edible Ink in Cake Decorating
Achieving vibrant colors with edible ink:
- Experiment with different color combinations to create eye-catching designs.
- Use high-quality edible ink cartridges to ensure the best color saturation.
- Adjust the printer settings for optimal printing results.
Preventing smudging or bleeding of the printed image:
- Allow the printed image to dry completely before handling or applying it to the cake.
- Avoid touching the printed surface with wet hands or tools.
- Consider using a protective spray or edible varnish to seal the image and prevent smudging.
Properly storing and handling edible ink cartridges:
- Store unused cartridges in a cool, dry place away from direct sunlight.
- Keep them sealed tightly to prevent air exposure, affecting print quality.
- Gently shake the cartridge before use to distribute the ink evenly.
These tips and tricks can enhance your cake decorating skills using edible ink. Experimenting with vibrant colors, preventing smudging or bleeding, and properly storing and handling edible ink cartridges will help you achieve stunning results on your cakes.
So unleash your creativity and make your cakes stand out with beautiful edible images!
How to Print Pictures on Cakes Using Edible Ink

Compatible Printers for Edible Ink Cartridges
- Before diving into the process, ensuring your printer is compatible with edible ink cartridges is crucial.
- Check the manufacturer’s specifications or consult customer support to determine if your printer can handle these cartridges.
Setting Up Your Printer for Edible Paper Printing
- Start by thoroughly cleaning your printer to remove any traces of regular ink.
- Install the edible ink cartridges according to the manufacturer’s instructions.
- Load the edible paper into the printer, making sure it aligns correctly.
- Adjust the print settings on your computer or printer control panel for optimal results.
Software Options for Image Editing and Resizing
- To achieve great printed images on cakes, consider using software tools to edit and resize your pictures before printing.
Here are some popular options:
- Adobe Photoshop: A professional-grade image editing software with advanced features and precise controls.
- Canva: A user-friendly online platform offering templates and easy-to-use editing tools.
- Microsoft Paint: An essential image editing tool available on most computers.
By utilizing these software options, you can enhance and resize your images as desired before transferring them onto cakes.
Remember, when applying an edible image to a cake, it’s essential to follow food safety guidelines and ensure that all materials used are suitable for consumption.
With compatible printers, proper setup, and image editing software, you’ll be well-equipped to create stunning personalized cakes using edible ink.
Detailed Instructions for Applying an Edible Image to a Cake
To achieve a flawless application of an edible image on your cake, follow our detailed guide that covers everything from start to finish. With these step-by-step instructions, you can create a professional-looking design that will impress everyone.
Prepare the Cake Surface
Before applying the edible image, preparing the cake surface properly is crucial. Follow these steps:
- Ensure that your cake is completely cooled down before starting.
- If necessary, level the top of the cake using a serrated knife or a cake leveler.
- Apply a thin layer of icing or frosting on the cake to create a smooth base for the edible image.
Apply the Edible Image
Now that your cake surface is ready, it’s time to apply the edible image. Here’s how:
- Carefully peel off the protective backing from the edible image sheet.
- Gently place the image onto the frosted surface of your cake.
- Start from one edge and slowly lay down the rest of the image, smoothing it as you go along.
- Use a clean, dry hand or a small roller to press out any air bubbles trapped underneath.
- Pay extra attention to corners and edges, ensuring they are securely attached.
Achieve a Smooth Finish
To give your cake an impeccable finish with no visible imperfections, follow these tips:
- Smooth out any wrinkles or creases by gently rubbing them with your finger or using a fondant smoother tool.
- Trim any excess edges of the edible image with sharp scissors or a craft knife for neatness.
- Allow sufficient time for drying and setting before serving or further decorating.
By following these comprehensive guides, you can effortlessly apply an edible image to your cake while consistently achieving professional results. Enjoy creating stunning designs that will leave your guests in awe!
Where to Purchase Edible Images and Affordable Edible Printers
Are you looking to add a personal touch to your cakes with edible images? Here’s a guide on where to find high-quality edible images and affordable edible printers for all your baking needs.
Reliable Online Sources for Edible Images
Several reliable online sources offer top-notch quality. Consider the following options:
- Sweet Prints: A trusted supplier known for their vibrant and detailed edible image prints.
- Icing Images: Offering a wide range of customizable designs, they are known for their excellent customer service.
- Frosting Sheets: With an extensive collection of pre-designed images, they provide quick and easy solutions.
Budget-Friendly Edible Printers
If you’re looking to invest in an edible printer for home use without breaking the bank, here are some budget-friendly options worth considering:
- Canon PIXMA TS6320: This versatile printer offers exceptional print quality at an affordable price point.
- Epson Expression Photo XP-8600: Known for its reliability and affordability, this printer delivers impressive results.
- YummyInks Edible Printer Bundle: A cost-effective option with everything you need to start.
Reputable Suppliers with Affordable Options
Finding reputable suppliers that offer affordable edible printing solutions can be a game-changer. Check out these suppliers known for their competitive prices:
- Global Sugar Art: They provide a wide range of affordable edible printing supplies, including printers, ink cartridges, and icing sheets.
- Cake Craft Shoppe: Offering great value for money, they stock various brands of printers and edible ink cartridges at reasonable prices.
- Edible Supply: Known for their competitive pricing, they offer a vast selection of supplies needed for edible printing.
With these resources at your fingertips, you can easily apply stunning edible images to your cakes and create delicious works of art. Happy baking!
Mastering the Art of Edible Image Cake Decorating
Congratulations! You are now well-equipped with the knowledge and skills to apply edible images to your cakes like a pro. With our step-by-step guide, you have learned how to transfer these beautiful designs onto your creations seamlessly.
Following our detailed instructions and using edible ink, you can bring your cake-decorating game to a new level.
Now that you have mastered this art form, it’s time to unleash your creativity and experiment with different designs and techniques. Don’t be afraid to push the boundaries and create unique edible masterpieces that will leave everyone in awe.
Remember, practice makes perfect, so keep honing your skills and exploring new possibilities.
So what are you waiting for? It’s time to get started on your next cake-decorating project! Gather all the necessary tools, choose a fantastic edible image design, and let your imagination run wild.
Whether for a birthday party, wedding celebration, or any special occasion, impress your guests with stunning cakes adorned with edible images.
FAQs – How to Apply Edible Image to Cake
Can I use any printer for edible images?
👉 No, not all printers are suitable for printing on edible paper. To ensure food safety and quality results, it is recommended to use printers designed explicitly for edible printing. These printers use food-grade inks that are safe for consumption.
Where can I purchase edible images?
👉 Edible images can be purchased from various online and offline sources. You can find them at specialty baking supply stores, cake decorating shops, or through online retailers. Make sure to choose reputable sellers that offer high-quality prints using FDA-approved materials.
How long do edible images last on a cake?
👉 The longevity of an edible image on a cake depends on various factors, such as humidity levels and storage conditions. Generally, if stored properly in a cool and dry place (away from direct sunlight), they can last up to several months without significant deterioration in quality.
Can I apply edible images to any cake?
👉 You can apply edible images to most cakes, including buttercream, fondant, and whipped cream. However, it is essential to ensure that the surface of the cake is smooth and free from excessive moisture or oil, as this can affect the adhesion of the image.
Can I refrigerate a cake with an edible image?
👉 Yes, you can refrigerate a cake with an edible image. However, it is recommended to cover the cake with a plastic dome or place it in a cake box to prevent condensation from affecting the image. Before serving, allow the cake to come to room temperature for best results.

Born and raised in a family of foodies, Georgia’s passion for cuisine was nurtured from a young age as she learned the intricacies of flavor and texture from her grandmother’s kitchen. As an adult, this early fascination blossomed into a full-fledged love affair with the culinary world.