
Can You Freeze Olive Garden Breadsticks: Easy Recipes
Have you ever asked the question Can you freeze Olive Garden breadsticks?
Olive Garden’s breadsticks have become synonymous with unlimited buttery indulgence, an iconic staple for anyone who dines there. The allure of these endless breadsticks is not just in their taste but in the experience they bring.
Imagine walking into Olive Garden, the scent of Italian food wafting through the air, and being greeted with a bowl of Zuppa Toscana or chicken gnocchi soup. But what truly completes this experience? The soft, garlicky breadsticks on the side.
For many, the first time they try these breadsticks is a revelation. The outer layer, brushed with olive oil and a sprinkle of sea salt, gives way to a soft interior that melts in your mouth.
It’s a wonder they are among the best things on Olive Garden’s menu. They shine when paired with pasta dishes or as an accompaniment to favorite soups like pasta e fagioli.
Recreating these amazing breadsticks in one’s kitchen has become a goal for many. Picture this: A large bowl sits on the counter, the yeast mixture bubbling away, signaling its readiness.
Beside it, another bowl of a stand mixer waits, with its dough hook attachment gleaming in anticipation. As the bread flour is gradually added, a dough ball starts to form, pulling away from the sides of the bowl.
Letting the dough rise, shaping it, and witnessing the magic of the second rise is therapeutic for many. The aroma that fills the kitchen as they bake is simply unparalleled.
And in just a few minutes, from the comfort of one’s own home, the taste of Olive Garden is brought to life.
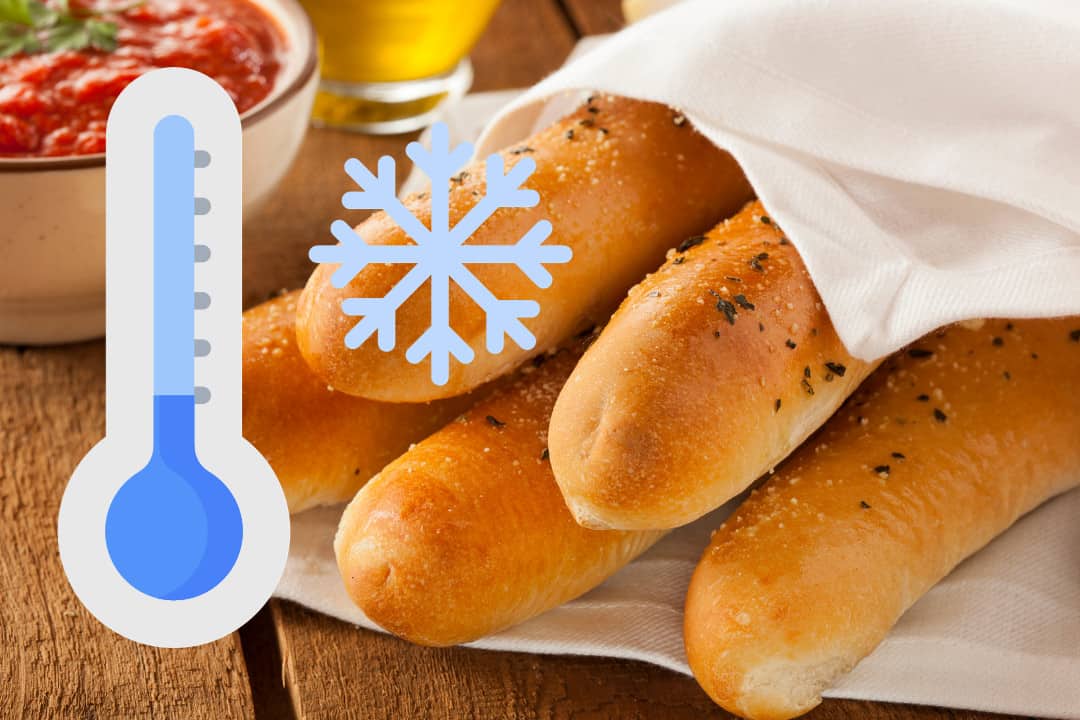
For those who manage to have leftovers, which is a rarity given how delectable these breadsticks are, the best way to store them is in an airtight or Ziploc bag.
If one ever needs to keep them longer, freezing them in a single layer on a cookie sheet before transferring them to an airtight bag is a great way to preserve their freshness.
When served fresh from the oven, these breadsticks are a great appetizer and an excellent introduction to any Italian meal. They remind us of the joy of simple pleasures, the beauty of essential ingredients coming together, and the memories created over shared meals.
So, the next time you’re craving that authentic Olive Garden experience, remember that with a little effort, you can have those buttery, soft breadsticks without even stepping out of your home. And while they might be a side dish to some, for many, they’re the star of the show.
Freezing Olive Garden Breadsticks: Tips and Instructions
Preserve the taste and texture of your favorite Olive Garden breadsticks by following these simple steps to freeze your leftover breadsticks. With the proper freezing techniques, you can ensure maximum freshness even when enjoying them at a later time.
To freeze Olive Garden breadsticks:
- Allow the breadsticks to cool completely before freezing. This step is crucial as it prevents condensation from forming inside the packaging, which could lead to soggy breadsticks.
- Wrap each breadstick tightly in aluminum foil or plastic wrap. This will help maintain their moisture and prevent freezer burn.
- Place the wrapped breadsticks in a resealable freezer bag or an airtight container. Remove any excess air from the bag or container before sealing it tightly. This extra layer of protection will further guard against freezer burn and help preserve their flavor.
- Label the bag or container with the freezing date to keep track of their freshness.
- Store the frozen Olive Garden breadsticks in the coldest part of your freezer, preferably at 0°F (-18°C) or below.
Following these instructions, you can enjoy your Olive Garden breadsticks for up to three months without compromising their taste or texture.
When you’re ready to enjoy your frozen breadsticks:
- Remove as many breadsticks as desired from the freezer bag or container without defrosting more than necessary.
- Preheat your oven to 350°F (175°C).
- Unwrap each frozen breadstick and place them on a baking sheet lined with parchment paper or aluminum foil.
- Bake for approximately 10 minutes until they are heated through and lightly golden brown on top.
- Once warmed, remove them from the oven and let them cool slightly before serving.
Now that you know how easy it is to freeze Olive Garden breadsticks, you can always have a supply of quick and delicious meals or snacks.
Whether you’re hosting a party or simply craving some warm breadsticks to accompany your favorite pasta dish, freezing them allows you to enjoy the Olive Garden experience at your convenience.
Remember, proper freezing techniques are essential for maintaining the quality of your breadsticks. By wrapping them carefully and storing them in airtight containers, you can ensure that their taste and texture remain as delightful as the day they were made.
So freeze those leftover breadsticks, and savor every bite whenever the mood strikes!
Reheating Olive Garden Breadsticks: Tips and Recipe
If you’re a fan of Olive Garden’s delicious breadsticks, you may wonder if you can freeze them for later enjoyment. The good news is, yes, you can freeze Olive Garden breadsticks!
Whether you have leftovers from a restaurant visit or want to stock up on these tasty treats, reheating them properly will ensure they taste just as fresh as when they first came out of the oven.
Get the Best Results When Reheating Frozen Olive Garden Breadsticks
There are a few essential tips to keep in mind. By following these guidelines, you’ll be able to enjoy warm and flavorful breadsticks that rival the ones served at Olive Garden itself:
- Preheat your oven: To achieve that perfect crispness on the outside while keeping the inside soft and fluffy, preheat your oven to 350°F (175°C).
- Proper wrapping: Before freezing your breadsticks, wrap them tightly in aluminum foil or an airtight container. This will prevent freezer burn and help retain their moisture.
- Thawing: Before reheating, allow the frozen breadsticks to thaw at room temperature for about 30 minutes. Melting them first ensures even heating throughout.
- Reheating time: Place the thawed breadsticks on a baking sheet lined with parchment paper or aluminum foil. Bake them in the preheated oven for approximately 10 minutes or until they are heated through.
- Broiling option: For an extra touch of crispiness, consider broiling the breadsticks for a minute or two after baking. Keep a close eye on them during this step to avoid burning.
Try Our Easy Recipe for Perfectly Warmed-Up Breadsticks Every Time
Now that you know how to reheat Olive Garden breadsticks, let’s dive into an easy recipe that guarantees a fresh-from-the-oven taste:
Ingredients:
- Thawed Olive Garden breadsticks
- Two tablespoons of melted butter.
- One teaspoon of garlic powder
- One teaspoon dried oregano
- Pinch of salt
Instructions:
- Preheat your oven to 350°F (175°C).
- Place the thawed breadsticks on a baking sheet lined with parchment paper or aluminum foil. Mix the melted butter, garlic powder, dried oregano, and salt.
- Brush the mixture evenly over each breadstick, ensuring they are well-coated.
- Bake the breadsticks in the oven for approximately 10 minutes or until heated.
- For added crispiness, broil them for an additional minute or two while keeping a close eye on them to prevent burning.
Following this simple recipe, you can enjoy warm and flavorful Olive Garden breadsticks whenever you desire.
Enjoy That Fresh-from-the-Oven Taste by Following Our Reheating Tips
Reheating frozen Olive Garden breadsticks doesn’t have to be a hassle. With our tips and recipes, you can easily savor these delectable treats.
Copycat Olive Garden Breadsticks Recipe
If you’re a fan of Olive Garden’s famous breadsticks, you’ll be thrilled that you can easily recreate them at home with this copycat recipe. Impress your family and friends by serving up these delicious homemade breadsticks that taste just like the ones from Olive Garden.
Not only will you satisfy your cravings, but you’ll also save money by skipping the restaurant and making them yourself.
Making copycat Olive Garden breadsticks is easier than you might think. With a few simple ingredients and patience, you can have a batch of warm and fluffy breadsticks ready to enjoy in no time. Here’s how:
Ingredients:
- Two ¼ cups of all-purpose flour
- One tablespoon sugar
- 1 ½ teaspoons salt
- 1 ½ teaspoons instant yeast
- Two tablespoons unsalted butter melted.
- ¾ cup warm water
Instructions: Combine the flour, sugar, salt, and instant yeast.
- Add the melted butter and warm water to the dry ingredients.
- Mix everything until a soft dough forms.
- Knead the dough on a lightly floured surface for about 5 minutes or until it becomes smooth and elastic.
- Place the dough in a greased bowl, cover it with a clean kitchen towel or plastic wrap, and let it rise in a warm place for about an hour or until doubled in size.
Once the dough has risen, it’s time to shape and bake your breadsticks:
- Preheat your oven to 425°F (220°C).
- Punch down the dough to release any air bubbles.
- Divide the dough into equal portions and roll each piece into a long rope-like shape.
- Place the shaped breadsticks onto a baking sheet lined with parchment paper.
- Bake for approximately 12-15 minutes or until the breadsticks turn golden brown.
- Remove from the oven and brush the tops of the breadsticks with melted butter.
- Add garlic salt or grated Parmesan cheese to add extra flavor if desired.
Now, you have a batch of warm and fluffy copycat Olive Garden breadsticks ready to be enjoyed. Serve them as an appetizer, side dish, or snack. Your family and friends will be impressed by your culinary skills and won’t believe these tasty treats were made right in your kitchen.
By following this easy recipe, you can recreate the taste of Olive Garden’s famous breadsticks without leaving the comfort of your home. Save money while indulging in the deliciousness that Olive Garden is known for. So why wait?
Start baking these copycat breadsticks today and treat yourself to a little restaurant-quality goodness at home!
Making Ahead: Storing Olive Garden Breadsticks
If you’re a fan of Olive Garden’s famous breadsticks, you may wonder if you can freeze them to enjoy later. The good news is that you can easily store these delicious treats with simple steps for future enjoyment.
Whether you’ve just baked a fresh batch at home or have some leftovers from a restaurant visit, here’s how to keep your Olive Garden breadsticks fresh and ready to enjoy whenever you want them.
Freshly Made Breadsticks
Following the proper steps to maintain their freshness and flavor is essential. Here’s what you need to do:
- Allow the breadsticks to cool completely before storing them. Placing warm breadsticks in storage can create moisture, leading to sogginess.
- Once cooled, place the breadsticks on a baking sheet lined with parchment paper.
- Cover the baking sheet with plastic wrap or aluminum foil, ensuring it is tightly sealed.
- Place the baking sheet in the refrigerator for short-term storage or freezer for long-term storage.
- If refrigerated, consume within 2-3 days for optimal freshness. If frozen, they can last up to 2 months.
Leftover Breadsticks
If you have leftover Olive Garden breadsticks from a meal and want to save them for later use, here are some tips:
- Wrap each breadstick tightly with plastic wrap or aluminum foil.
- Place the wrapped breadsticks in an airtight container or ziplock bag.
- Label the container or bag with the date of storage.
- Store them in the refrigerator for up to 3 days or freeze for up to 2 months.
Store-Bought Breadsticks
If you’ve purchased pre-packaged Olive Garden breadsticks from a store and want to store them properly, follow these steps:
- Check the packaging for any specific instructions or best-by dates.
- Keep them unopened in a cool, dry place like your pantry until expiration.
- Once opened, transfer any remaining breadsticks to an airtight container or ziplock bag.
- Store them in the refrigerator for up to 3 days or freeze for up to 2 months.
By following these simple storage methods, you can ensure that your Olive Garden breadsticks remain fresh and delicious for future enjoyment.
So next time you have some extra breadsticks on hand or want to make a larger batch ahead of time, remember these tips to keep your breadsticks tasting their best.
Whether baking them at home or saving leftovers from a restaurant visit, you can enjoy the delectable taste of Olive Garden breadsticks later without compromising their quality.
Pairing Suggestions for Homemade Olive Garden Breadsticks
Enhancing your homemade breadstick experience is all about finding the perfect accompaniments that complement the flavors of these savory treats.
Elevate your meal by pairing your homemade olive garden breadsticks with other dishes, and explore various tasty combinations to create a delightful culinary experience.
Exploring Tasty Combinations
There are countless options to consider. Here are some delicious combinations that will take your breadstick game to the next level:
Classic Marinara Dip:

Dive into a bowl of rich marinara sauce that perfectly complements the warm, garlicky goodness of the breadsticks. The tanginess of the tomato-based dip beautifully balances out the savory flavors, creating a match made in culinary heaven.
Creamy Alfredo Sauce:

Indulge in a velvety-smooth alfredo sauce that adds a layer of richness to every bite. The creamy texture and subtle garlic undertones create a luxurious pairing that will leave you craving more.
Zesty Garlic Butter:

Whip up a simple yet flavorful garlic butter by combining melted butter with minced garlic and herbs like parsley or oregano. Slather this pungent concoction onto your breadsticks for an explosion of aromatic flavors.
Perfect Accompaniments
Pairing your homemade olive garden breadsticks with other dishes can transform them into a complete meal experience. Consider these delectable options:
Italian Wedding Soup:

This hearty soup filled with meatballs, vegetables, and pasta is ideal for dipping your warm breadsticks. Combining savory broth and tender bites creates a satisfying harmony on your palate.
Caprese Salad:
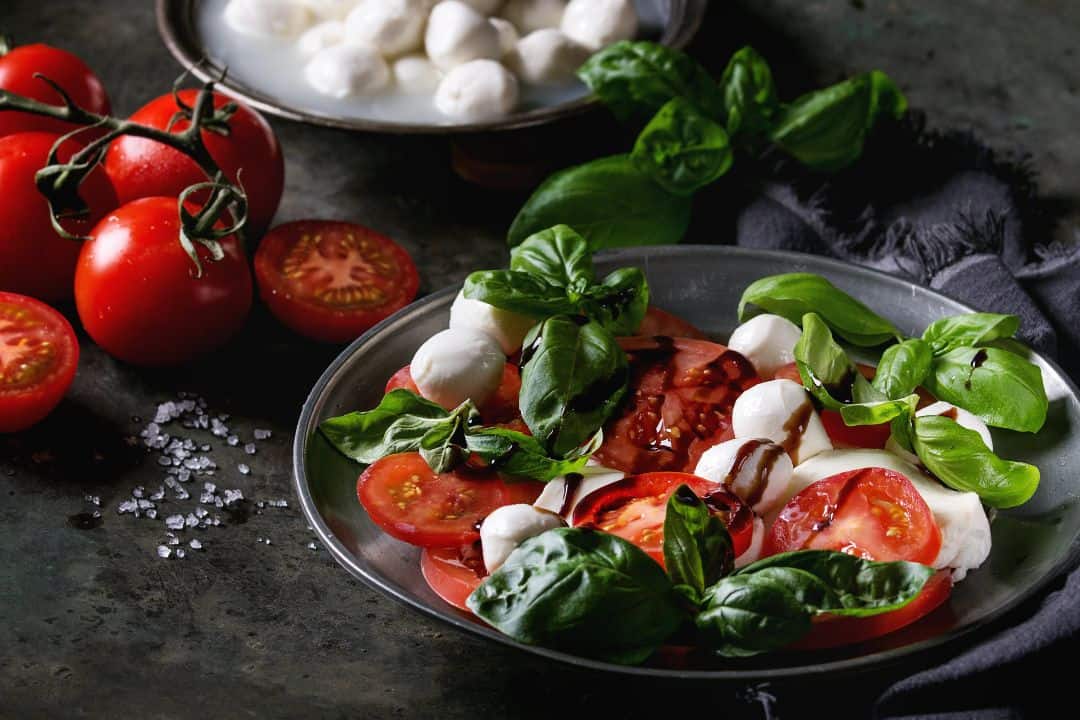
Embrace freshness by serving a vibrant Caprese salad alongside your breadsticks. Slices of ripe tomatoes, fresh mozzarella cheese, basil leaves, and balsamic glaze make for a refreshing contrast to the warm and savory breadsticks.
Chicken Parmesan:

Elevate your meal by pairing your breadsticks with a classic Italian favorite, like chicken parmesan. The crispy breaded chicken topped with marinara sauce and melted cheese complements the flavors of the breadsticks, creating a truly indulgent experience.
Elevating Your Meal
To take your homemade olive garden breadstick feast to new heights, consider these additional dishes that will elevate your culinary adventure:
Lasagna:

Layers of pasta, meaty sauce, and gooey cheese come together in this comforting dish. Combining lasagna and breadsticks creates a satisfying medley of flavors and textures.
Eggplant Parmesan:

Try eggplant parmesan for a vegetarian twist on the classic chicken parmesan. The tender slices of eggplant coated in breadcrumbs and baked to perfection pair wonderfully with the garlic-infused breadsticks.
Shrimp Scampi:

Treat yourself to an elegant seafood dish by serving shrimp scampi alongside your homemade breadsticks. The succulent shrimp bathed in a buttery garlic sauce offers a delightful contrast when enjoyed with warm, pillowy bites.
Incorporating these pairing suggestions into your homemade olive garden breadstick experience will ensure that every bite is bursting with flavor.
Nutritional Information and Calorie Count
Understanding the nutritional content of olive garden breadstick servings is essential for those who want to make informed choices about their calorie intake while enjoying this popular treat.
You can better manage your dietary goals by having accurate information about the ingredients, calories, and other factors. Let’s delve into the details.
Ingredients and Flavour
Olive Garden breadsticks are known for their delicious flavor that complements various meals. The main ingredients include flour, water, sugar, yeast, salt, dairy products like milk or butter, and a hint of garlic powder.
These simple yet flavorful components come together to create a mouthwatering experience.
Calorie Count and Serving Size
Being aware of portion sizes is crucial. Each Olive Garden breadstick typically contains around 140 calories. However, remember that this value may vary slightly based on size and thickness.
It’s important to note that these calorie counts are per serving. A typical serving size consists of two breadsticks. Therefore, if you indulge in four breadsticks during your mealtime at Olive Garden or recreate the experience at home with frozen ones, you would consume approximately 280 calories just from the breadsticks alone.
Tips for Enjoyment
While it’s tempting to devour multiple batches of these delectable treats in one sitting, moderation is essential when considering your overall caloric intake. Here are some tips to help you enjoy Olive Garden breadsticks without going overboard:
- Portion Control: Stick to the recommended serving size of two breadsticks.
- Balance Your Meal: Pair your breadsticks with a healthy salad or vegetable-based dish to ensure a well-rounded meal.
- Watch Your Toppings: Be mindful of any additional spreads or dips you may pair with the breadsticks, which can add extra calories.
- Hydration: Drinking water alongside your breadsticks can help you feel fuller and prevent overeating.
Packaging and Shelf Life
If you’re wondering about the shelf life of Olive Garden breadsticks, freezing them is a viable option. The packaging usually instructs how to freeze and reheat the breadsticks properly. Frozen breadsticks can maintain flavor and texture when stored in suitable conditions for several months.
To ensure the best quality, consuming the frozen breadsticks within a specific timeframe is recommended. Typically, they remain fresh for up to three months when stored at 0°F (-18°C) or below. However, always refer to the packaging or manufacturer’s guidelines for precise storage and shelf life information.
Enjoy Homemade Olive Garden Breadsticks
Congratulations! You’ve now learned how to make delicious homemade Olive Garden breadsticks. Whether you’re looking to freeze them for later use or serve them fresh, you have all the tips and instructions at your fingertips.
With this recipe, you can recreate the warm, buttery goodness of Olive Garden breadsticks in your kitchen.
So why wait? Gather your ingredients, roll up your sleeves, and get ready to impress your family and friends with these mouthwatering breadsticks. Whether you’re hosting a dinner party or simply craving a taste of Olive Garden at home, these homemade breadsticks will surely be a hit.
Enjoy knowing you made them from scratch and take pride in serving something extraordinary.
FAQs – Can You Freeze Olive Garden Breadsticks?
Can I use whole wheat flour instead of all-purpose flour?
👉 You can substitute whole wheat flour for all-purpose flour in this recipe. However, remember that the texture and flavor may differ slightly from the original version.
Can I add garlic powder or other seasonings to the dough?
👉 Absolutely! Feel free to experiment with different seasonings like garlic powder, Italian herbs, or cheese. Just sprinkle them on top before baking for an extra burst of flavor.
How long do these breadsticks stay fresh?
👉 When stored properly in an airtight container at room temperature, these breadsticks can stay fresh for 2-3 days. If you want to extend their shelf life, freezing is always an option.
Can I reheat frozen breadsticks in the microwave?
👉 While it’s possible to reheat frozen breadsticks in the microwave, we recommend using an oven or toaster oven for best results. This will help preserve their texture and ensure they stay crispy on the outside while remaining soft inside.
Can I double or halve this recipe?
👉 Yes! This recipe is easily scalable, depending on your needs. Adjust the quantities of the ingredients accordingly.

Born and raised in a family of foodies, Georgia’s passion for cuisine was nurtured from a young age as she learned the intricacies of flavor and texture from her grandmother’s kitchen. As an adult, this early fascination blossomed into a full-fledged love affair with the culinary world.


